Create and Verify a Benefit Plan
Build a realistic synthetic PPO plan in the portal, then verify the persisted configuration through the benefit-plan API.
This tutorial uses synthetic configuration and the Development-only local demo sign-in. It does not require member PHI or production credentials.
What You Will Produce
You will create Evaluator Premier PPO 2026 with a 2026 effective date, representative cost sharing, and a network label. The next tutorial adds service-level benefits and exclusions in the portal, with API examples for repeatable automation.
| Setting | Evaluator value | Why it matters |
|---|---|---|
| Plan name | Evaluator Premier PPO 2026 | Human-readable operations label |
| Product / metal tier | PPO / Gold | Product classification and member-facing tier |
| Plan year | 2026 | Effective benefit and accumulator period |
| Individual deductible | $1,500 | Member responsibility before deductible-covered services pay |
| Individual OOP maximum | $6,000 | Upper bound for applicable member cost sharing |
1. Open the Benefit Plan Workspace
- Start the local Kubernetes deployment and portal port-forward.
- Open
http://localhost:8080/local-demo/sign-in?redirectUri=/benefit-plans. - Confirm the tenant badge says Local Demo Tenant (Demo).
- Select Configuration → Benefit Plans if you enter through another portal page.
The local demo sign-in exists for development and guided demonstrations. Use the configured identity provider and least-privilege roles outside a local environment.
2. Create the Plan
Select New Plan. Enter a plan name, select the product and metal tiers, identify the provider network, and complete the financial structure.
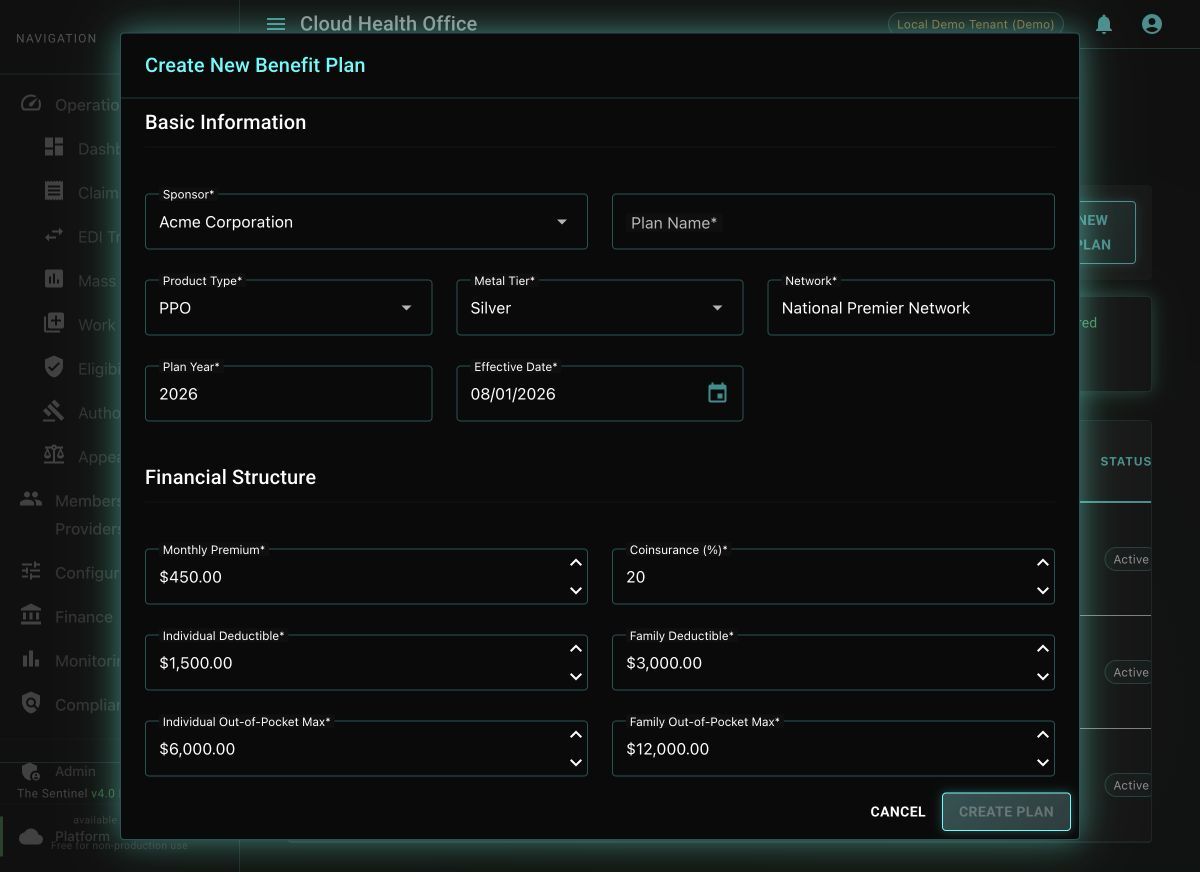
- Use Acme Corporation as the synthetic sponsor.
- Set the name to Evaluator Premier PPO 2026.
- Select PPO and Gold.
- Set the network to National Premier Network.
- Use plan year 2026 and effective date 01/01/2026.
- Enter the deductible and out-of-pocket values from the table above, then select Create Plan.
The portal generates the stable plan ID. Copy that ID from the plan list; every remaining tutorial refers to it as PLAN_ID.
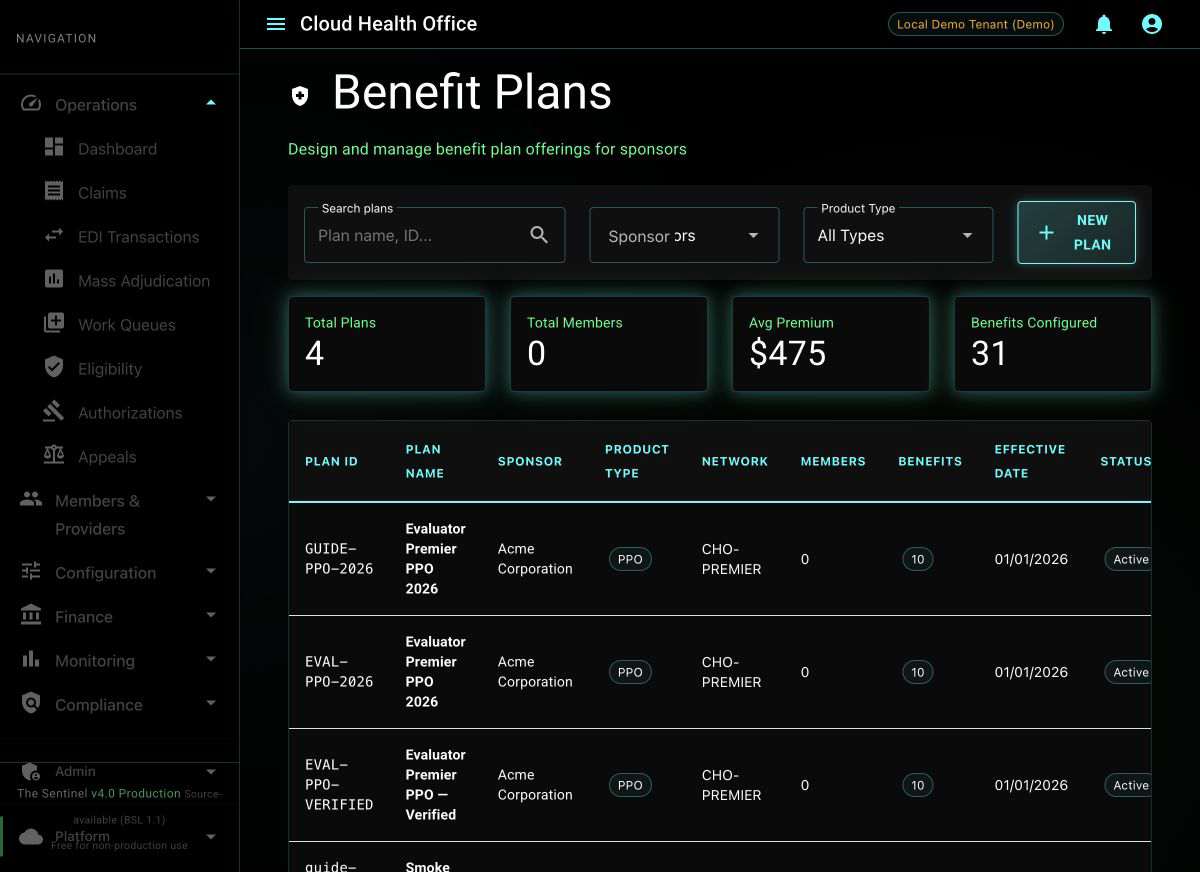
3. Verify the Persisted Plan
Verify the service response rather than relying only on a success notification:
export BENEFIT_PLAN_URL=http://localhost:5002
export TENANT_ID=<portal-tenant-id>
export PLAN_ID=<generated-plan-id>

curl -fsS \
  -H "X-Tenant-ID: ${TENANT_ID}" \
  "${BENEFIT_PLAN_URL}/api/v1/plans/${PLAN_ID}" |
  jq '{planId, planName, planType, metalLevel,
       effectiveDate, costSharing}'
Open the plan from the workspace and compare the overview with the API response. Sponsor, product type, metal tier, network, plan year, lifecycle status, premium, deductible, out-of-pocket maximums, and coinsurance should agree.
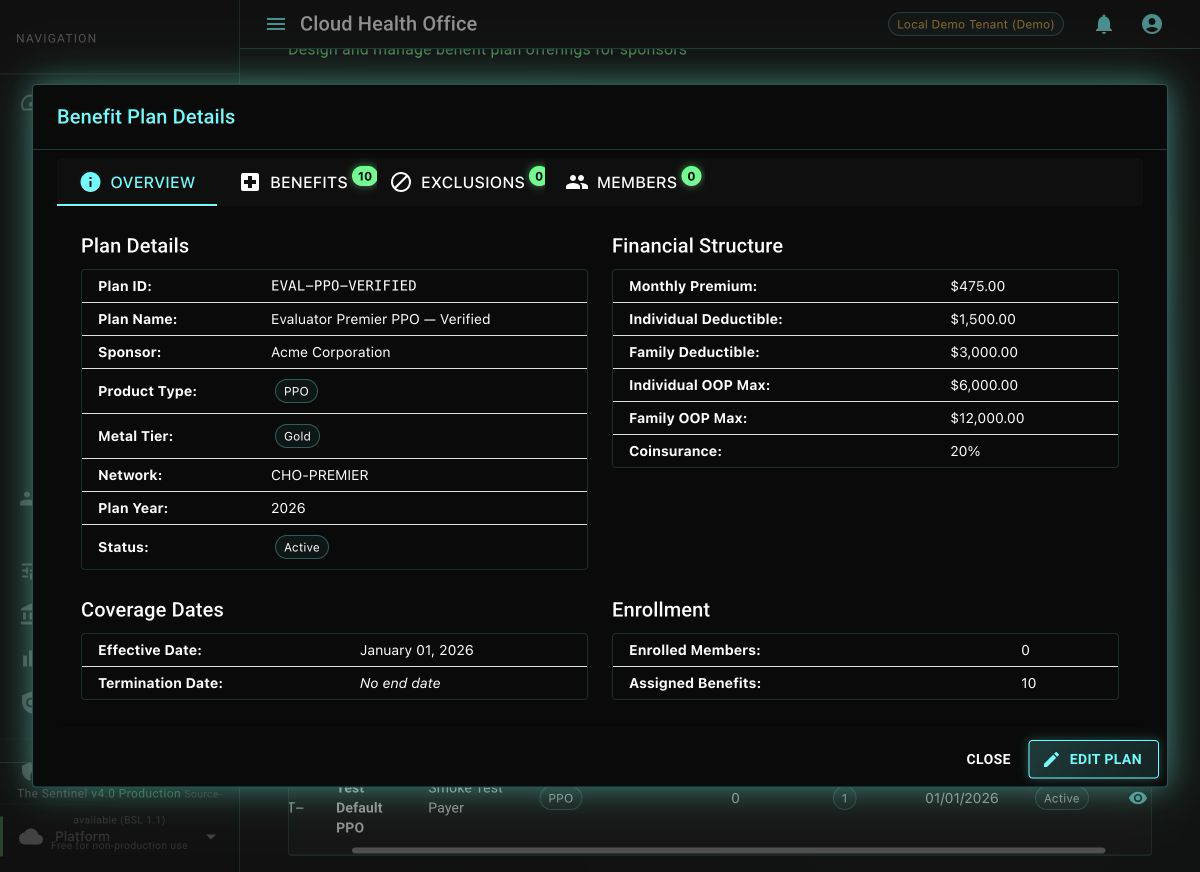
The API and portal contain the generated plan ID, selected plan identity, 2026 effective date, $475 monthly premium, $1,500 individual deductible, $6,000 individual out-of-pocket maximum, and 20% plan-level coinsurance.
Troubleshooting
| Symptom | Check |
|---|---|
| Create Plan remains disabled | Complete every required field, including Plan Name and Effective Date. |
| Plan is missing from the list | Clear filters and confirm the portal tenant matches the X-Tenant-ID used by the service. |
| API returns 404 | Use the generated plan ID—not the display name—and the same tenant header. |
| Portal values differ from API values | Treat the API response as the verification boundary and record the projection issue for review. |